No edit summary Tag: rte-source |
Tags: Visual edit apiedit |
||
| Line 144: | Line 144: | ||
|- |
|- |
||
|[[File:Wheat.jpg|thumb|center|40px]] |
|[[File:Wheat.jpg|thumb|center|40px]] |
||
| − | |Wheat |
+ | |Golden Wheat |
| |
| |
||
|} |
|} |
||
Revision as of 15:36, 21 February 2015
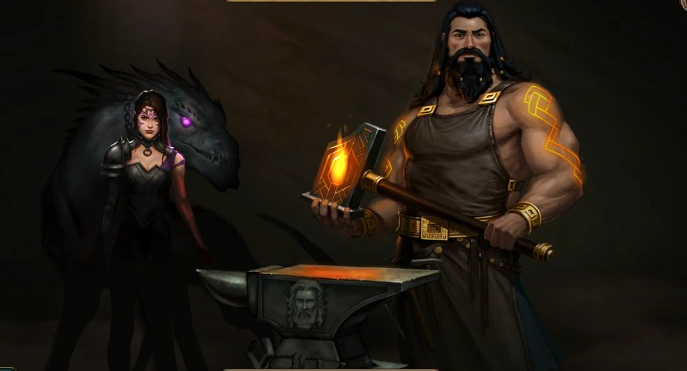
For centuries Hephaestus’ Forge remained hidden, unnoticed by mortal eye. Under the cover of a cloaking spell, Hephaestus hammered away at his anvil, the heat of the flame always at his back. His small group of followers - a team of Adventurers who would bring him supplies and materials for his blacksmith products - were the only visitors to his den. Although Hephaestus’ smithery and creations have been known across Atlantis for their superb quality for ages, the reclusive Royal Mage never let the people of Atlantis enter his Forge - until now. After much negotiation, Archmage Triton and the rest of the Royal Mages have convinced Hephaestus that it is in Atlantis’ best interests to allow all the kingdoms of Atlantis to have access to his blacksmith skill and tools. Because of this, he has now made his Forge known to mortal eye and has created a portal in each kingdom that allows the citizens of Atlantis to access his lair.
THIS PAGE IS UNDER CONSTRUCTION
You may access the Forge in your City by clicking on the volcanic cave in the mountainside or the “Forge” button at the top of your game screen. Once in the Forge, you will be presented with two options that you must hover over and click to select: Adventurers and the Forge itself.
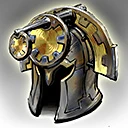
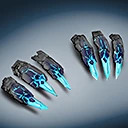
Hephaestus' Forge
Hephaestus has opened a portal to his blacksmithing station in the mountainside of your First City and you can now take advantage of his legendary skills to strengthen your kingdom! Using the ingredients gathered by your Adventurers, he can craft weapons, armor, accessories, and other ingredients that can be equipped onto and used by your troops to increase their stats.
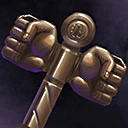
There are 4 key components to forging; Hephaestus and his Hammer, Recipes, Ingredients, and Equipment. Hephaestus' Hammer is used to craft equipment and advanced ingredients. Each piece of equipment and advanced ingredient requires a recipe to be crafted. Each recipe requires ingredients which are obtained either by the Adventurers or by crafting.
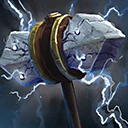
Hephaestus
Hephaestus plays the role of the blacksmith in the Forge. His section of the screen displays his current level and its experience progress, the status and strength of his hammer, and the option to repair his hammer.
Leveling up Hephaestus: Initially some items may be too advanced for Hephaestus. These will require Hephaestus to gain experience and level up before he is able to craft these recipes. With each successful forge, Hephaestus gains experience. Leveling up Hephaestus will increase the damage capacity of his hammer, increase the odds in which Hephaestus will forge strong pieces of equipment, and reduce the risk of a failed forge.
Hammer Status: Crafting recipes and upgrading equipment will deal damage to Hephaestus’ hammer regardless of whether the forge was successful or not. Lower level recipes deal a small amount of damage while high level recipes deal a large amount of damage. If you attempt to make a recipe that will deal more damage than the hammer has the capacity for, Hephaestus will not allow the forge to happen.
Repairing the Hammer: At any time you may repair Hephaestus’ hammer. The amount of time it takes to repair the hammer depends on the strength of the hammer. While the hammer is being repaired, Hephaestus cannot forge or upgrade items. You may speed through this process by selecting “Speed” and choosing which Speed Up item you wish to use.
Hephaestus' Stats
| Level | Experience Required | Hammer Health | Hammer Repair Time |
|---|---|---|---|
| 0 | 0 | 5 | 30 Minutes |
| 1 | 10 | 10 | 30 Minutes |
| 2 | 50 | 20 | 30 Minutes |
| 3 | 150 | 30 | 30 Minutes |
| 4 | 300 | 40 | 30 Minutes |
| 5 | 50 | 30 Minutes | |
| 6 | 1000 | 65 | 30 Minutes |
| 7 | 2500 | 80 | 30 Minutes |
| 8 | 5000 | 95 | 30 Minutes |
| 9 | 10000 | ||
| 10 |
Recipes
Recipes can be found in the Recipes tab, which lists all the available things that can be crafted. You can use the search bar in order to find a specific recipe. The list of recipes can be arranged by alphabetical name or type of recipe (ingredient or equipment). They are used to make Equipment or advanced ingredients. There are currently 79 recipes for equipment and 27 recipes for advanced ingredients.
Ingredients
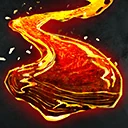
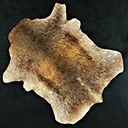
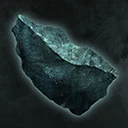
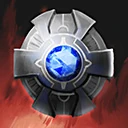
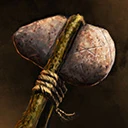
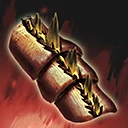
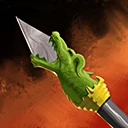
All recipes require ingredients. Some ingredients can only be found by the adventurers and are listed below. Using these ingredients you can further craft more ingredients and equipment.
| Icon | Name | Location |
|---|---|---|
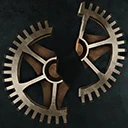 |
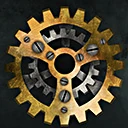
Cracked Cog | |
 |
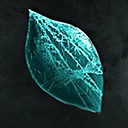
Elemental Air | |
  |
Elemental Earth | |
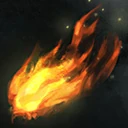  |
Elemental Fire | |
  |
Elemental Spirit | |
  |
Elemental Water | |
  |
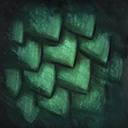
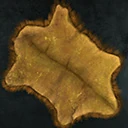
Fragile Scale | |
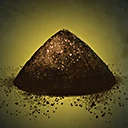  |
Iron Dust | |
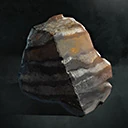  |
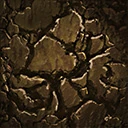
Metamorphic Stone | |
  |
Ruby Relic | |
  |
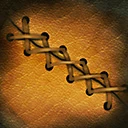
Tattered Hide | |
  |
Transmutation Stone | |
  |
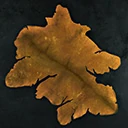
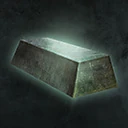
Golden Wheat |
In general experience granted to Hephaestus for crafting is
- +1 for Common
- +3 for Uncommon
- +5 for Rare
- +10 for Super Rare
- +?? for Elite
- +?? for Epic
- +?? for Legendary
In the event that those standards change, the exp granted is still listed in the following tables.
(Note: If you are filling the tables out please test before posting! To keep everything uniform, ingredients should be put in order as they appear in-game; left to right and top to bottom)
Ingredient Recipes
| Icon | Name | Ingredients | Level Req. |
Exp. Given |
Damage to Hammer | Tier |
|---|---|---|---|---|---|---|
  |
Blue Powder |
1 Fine Toothed Cog, 1 tanned Hide, 1 Refined Iron Ore, 1 Hardened Scale |
2 | +5 | -7 | Rare |
  |
Dull Scale | 4 Fragile Scale | 0 | +3 | -3 | Uncommon |
  |
Enameled Cog | 4 Fine Toothed Cog | 5 | +10 | -11 | Super Rare |
  |
Enchanted Iron Bar | 4 Refined Iron Ore | 5 | +10 | -11 | Super Rare |
  |
Fine Toothed Cog | 4 Sturdy Cog | 1 | +5 | -7 | Rare |
  |
Gray Powder | 1 Tattered Hide, 1 Fragile Scale, 1 Cracked Cog, 1 Iron Dust | 0 | +1 | -1 | Common |
  |
Green Powder | 1 Iron Ore, 1 Dull Scale, 1 Stitched Hide, 1 Sturdy Cog | 1 | +3 | -3 | Uncommon |
  |
Hardened Scale | 4 Dull Scale | 1 | +5 | -7 | Rare |
  |
Magic Infused Scale | 4 Hardened Scale | 5 | +10 | -11 | Super Rare |
  |
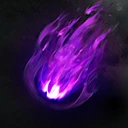
Primal Frost | 1 Metamorphic Stone, 2 Elemental Water, 2 Elemental Spirit | 3 | +5 | -7 | Rare |
  |
Primal Magma | 1 Metamorphic Stone, 2 Elemental Earth, 2 Elemental Fire | 3 | +5 | -7 | Rare |
  |
Primal Ooze | 1 Metamorphic Stone, 2 Elemental Earth, 2 Elemental Water | 3 | +5 | -7 | Rare |
  |
Primal Sand | 1 Metamorphic Stone, 2 Elemental Air, 2 Elemental Earth | 3 | +5 | -7 | Rare |
  |
Primal Smoke | 1 Metamorphic Stone, 2 Elemental Air, 2 Elemental Fire | 3 | +5 | -7 | Rare |
  |
Primal Storm | 1 Metamorphic Stone, 2 Elemental Air, 2 Elemental Water | 3 | +5 | -7 | Rare |
  |
Pristine Hide | 4 Tanned Hide | 5 | +10 | -11 | Super Rare |
  |
Purple Powder | 1 Pristine Hide, 1 Enameled Cog, 1 Magic Infused Scale, 1 Enchanted Iron Bar | 3 | +10 | -11 | Super Rare |
  |
Raw Iron Ore | 4 Iron Dust | 0 | +3 | -3 | Uncommon |
  |
Refined Iron Bar | 4 Raw Iron Ore | 1 | +5 | -7 | Rare |
  |
Stitched Hide | 4 Tattered Hide | 0 | +3 | -3 | Uncommon |
  |
Sturdy Cog | 4 Cracked Cog | 0 | +3 | -3 | Uncommon |
  |
Tanned Hide | 4 Stitched Hide | 1 | +5 | -7 | Rare |
  |
True Chaos | 1 Transmutation Stone, 2 Primal Storm, 1 Elemental Spirit | 5 | -11 | Super Rare | |
  |
True Darkness | 1 Transmutation Stone, 2 Primal Smoke, 1 Elemental Spirit | 5 | -11 | Super Rare | |
  |
True Life | 1 Transmutation Stone, 2 Primal Ooze, 1 Elemental Spirit | 5 | -11 | Super Rare | |
  |
True Time | 1 Transmutation Stone, 1 Primal Sand, 1 Primal Frost, 1 Elemental Spirit | 5 | -11 | Super Rare | |
  |
Yellow Powder | 1 True Chaos, 1 True Darkness, 1 True Life, 1 True Time | 4 | -17 | Elite |
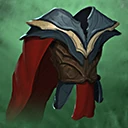
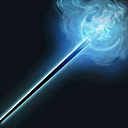
Equipment Recipes
When forging gear for troops, there is a percentage chance for failure, weak, normal, and strong versions of the item. Failure means the items are wasted with no payoff.
Weak items have a single stat boost. Normal items have two stat boosts, with strong having the maximum of 3 stat boosts. When stat boosts are given, the stat is "rolled" by a random number generator, therefore it is often difficult to get a "strong" piece of gear with 3 high stat rolls, it often requires hundreds of forge attempts to attain an "ideal" piece of gear. The chances of "strong" equipment increase with each additional level that Hephaestus gains.
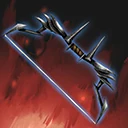
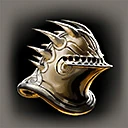
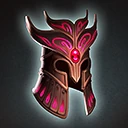
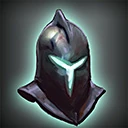
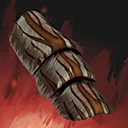
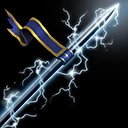
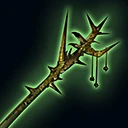
There are 3 types of equipment; Weapon, Armor, and Accessory. Currently Accessory type of equipment is unavailable.
| Icon | Name | Ingredients | Required Level | Exp. Given | Damage to Hammer | Tier | Type |
|---|---|---|---|---|---|---|---|
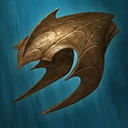
  |
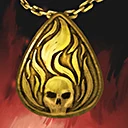
Arctic Leviathan Amulet | 2 Primal Frost, 1 True Life, 1 Tanned Hide | 6 | -7 | Rare | ||
  |
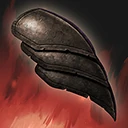
Arctic Leviathan Plating | 2 Primal Frost, 1 True Life, 1 Refined Iron Bar | 6 | -7 | Rare | ||
  |
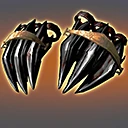
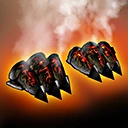
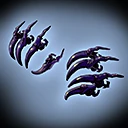
Armored Transport Claws | 3 Tattered Hide | 2 | -1 | Common | ||
  |
Armored Transport Plating | 3 Iron Dust | 2 | -1 | Common | ||
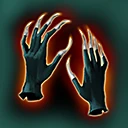  |
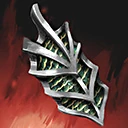
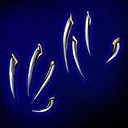
Banshee Claws | 1 Stitched Hide, 3 Elemental Air | 3 | -3 | Uncommon | ||
  |
Banshee Cloak | 1 Sturdy Cog, 3 Elemental Air | 3 | -3 | Uncommon | ||
  |
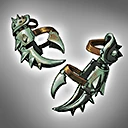
Battle Dragon Claws | 2 Fragile Scale, 2 Elemental Air | 2 | -1 | Common | ||
  |
Battle Dragon Plating | 2 Iron Dust, 2 Elemental Air | 2 | -1 | Common | ||
  |
Colossal Mite Claws | 2 True Chaos, 1 Magic Infused Scale, 1 True Time | 9 | -7 | Rare | ||
  |
Colossal Mite Plating | 2 True Chaos, 1 Pristine Hide, 1 True Time | 9 | -7 | Rare | ||
  |
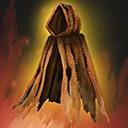
Conscript Amulet | 0 | -1 | Common | |||
  |
Conscript Hammer | 0 | -1 | Common | |||
  |
Dark Slayer Robes | 4 | |||||
  |
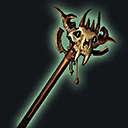
Dark Slayer Staff | 4 | |||||
  |
Dimensional Ruiner Hammer | 6 | |||||
  |
Dimensional Ruiner Helm | 6 | |||||
  |
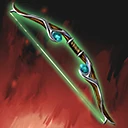
Dragon Rider Bow | 9 | |||||
  |
Dragon Rider Helm | 9 | |||||
  |
Dragon Rider Helm of Adoration | 10 | |||||
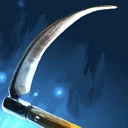  |
Dragon Rider Scythe | 10 | |||||
  |
Fangtooth Helm | 3 | |||||
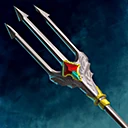  |
Fangtooth Spear | 3 | |||||
  |
Fire Mirror Claws | 2 | |||||
  |
Fire Mirror Helm | 2 | |||||
  |
Frost Giant Amulet | 5 | |||||
  |
Frost Giant Hammer | 5 | |||||
  |
Giant's Amulet | 2 | |||||
  |
Giant's Staff | 2 | |||||
  |
Granite Ogre Plating | 3 | |||||
  |
Granite Ogre Staff | 3 | |||||
  |
Halberdsman Helm of Adoration | 8 | |||||
  |
Halberdsman Scythe | 8 | |||||
  |
Halberdsman Shield | 1 | |||||
  |
Halberdsman Spear | 1 | |||||
  |
Lava Jaw Amulet | 3 | |||||
  |
Lava Jaw Claws | 3 | |||||
  |
Lightning Cannon Plating | 6 | |||||
  |
Lightning Cannon Rune | 6 | |||||
  |
Longbowman Bow | 2 | |||||
  |
Longbowman Cloak | 2 | |||||
  |
Longbowman Seeking Arrows | 8 | |||||
  |
Minotaur Amulet | 1 | |||||
  |
Minotaur Hammer | 1 | |||||
  |
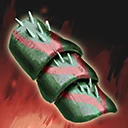
Pack Dragon Claws | 3 | |||||
  |
Pack Dragon Plating | 3 | |||||
  |
Petrified Titan Hammer | 5 | |||||
  |
Petrified Titan Plating | 5 | |||||
  |
Petrified Titan Seeking Arrows | 9 | |||||
  |
Porter Robes | 0 | |||||
  |
Porter Staff | 0 | |||||
  |
Sand Strider Helm | 5 | |||||
  |
Sand Strider Helm of Adoration | 9 | |||||
  |
Sand Strider Scythe | 9 | |||||
  |
Sand Strider Spear | 5 | |||||
  |
Shadow Stalker Claws | 7 | |||||
  |
Shadow Stalker Plating | 7 | |||||
  |
Shaman Helm | 7 | |||||
  |
Shaman Staff | 7 | |||||
  |
Soul Reaper Amulet | 4 | |||||
  |
Soul Reaper Claws | 4 | |||||
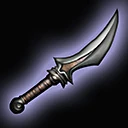  |
Spy Dagger | 1 | |||||
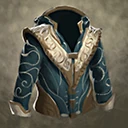  |
Spy Robes | 1 | |||||
  |
Steelshard Harrier Claws | 7 | |||||
  |
Steelshard Harrier Plating | 7 | |||||
  |
Storm Drake Helm | 6 | |||||
  |
Storm Drake Spear | 6 | |||||
  |
Swift Strike Dragon Claws | 2 | |||||
  |
Swift Strike Dragon Plating | 2 | |||||
  |
Thunder Golem Hammer | 6 | |||||
  |
Thunder Golem Plating | 6 | |||||
  |
Venge Wyrm Plating | 6 | |||||
  |
Venge Wyrm Staff | 6 | |||||
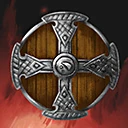  |
Venom Dweller Shield | 5 | |||||
  |
Venom Dweller Staff | 5 | |||||
  |
Volt Ranger Cloak | 8 | |||||
  |
Volt Ranger Rune | 8 | |||||
  |
Volt Ranger Seeking Arrows | 10 | |||||
  |
War Scarab Amulet | 8 | |||||
  |
War Scarab Plating | 8 |
Upgrading Equipment
Upgrading items requires powders of the same quality:
| Icon | Name | Tier |
|---|---|---|
| |
Gray | Common |
| |
Green | Uncommon |
| |
Blue | Rare |
| |
Purple |
Super Rare |
| |
Yellow | Elite |
  |
Silver* | Epic? |
  |
Black* | Legendary? |
[*]These Powders currently cannot be crafted. It is also unsure if they are for upgrading the listed quality.
Upgrading an item increases its current stats by its base stats. Take for example an item with base stats of +3 life, +7 defense, and +130 range. At level 2 it will become +6 life, +14 defense, and +260 range. At level 3 it will become +9 life, +21 defense, and +390 range, etc, etc.
Each additional level reduces the upgrade chance by a significant amount to the eventual point that there is a 0% chance of success. It becomes necessary to use the Vulcan's Blessing boost to assure success against literally impossible odds on higher level upgrades. Each additional level also requires more powders than the previous level.
If an item fails an upgrade, it becomes broken. The item is automatically unequipped from the troop and rendered nonfunctional until it is repaired. Repairing takes a set amount of time and renders the forge nonfunctional until the item is finished being repaired. The repair time is longer for higher level and higher tiered items.
Equipping Equipment
Items may be equipped by entering the "troops" tab and selecting the box underneath the appropriate troop, and selecting the gear. Once you have a piece of equipment you can then equip it to the troop it was designated to serve. There are 3 types of equipment - weapons, armor, and accessories. (accessories currently unavailable) Each troop type has 3 slots for equipment with 1 for each equipment type. A single piece of equipment will enhance the stats of all troops of that type (i.e. equipping a Porter Staff boosts all of your Porters’ stats).
Crushing Items
If you no longer wish to have a particular piece of equipment, you may “crush” it down for parts. Go to Hephaestus' forge and then "Equipment". Select the piece of equipment you wish to crush. Then, in the bottom half of the Equipment tab, select the “Crush” option. This action cannot be undone, so choose wisely.
After you crush the item, you are guaranteed to receive a random powder. Higher tiered items have higher chances at giving high tiered powders. In this way, common powders can be easily farmed by common items. You may also receive back one or more ingredients that were used to make the item, but this is not a guarantee.
Boosts
Boosts can be used to increase the odds of a successful forge. Before crafting a recipe or upgrading a piece of equipment, you can choose to use a boost by selecting one from the drop down menu above the item’s Success Chance bar. These boosts have rarity tiers that correspond with the rarity tiers of items. You can only use common boosts for common items, uncommon boosts for uncommon items, and rare boosts for rare items. All other combinations will not work.
Strength of Hephaestus (common) - Eliminates the chance of failure to forge a common item.
Strength of Hephaestus (uncommon) - Eliminates the chance of failure to forge an uncommon item.
Strength of Hephaestus (rare) - Eliminates the chance of failure to forge a rare item.
Elixir of Kratos (common) - Doubles the chance of a "strong" forge for a common item.
Elixir of Kratos (uncommon) - Doubles the chance of a "strong" forge for an uncommon item.
Elixir of Kratos (rare) - Doubles the chance of a "strong" forge for a rare item.
Vulcan's Blessing (common) - Guarantees upgrade chance for a common item.
Vulcan's Blessing (uncommon) - Guarantees upgrade chance for an uncommon item.
Vulcan's Blessing (rare) - Guarantees upgrade chance for a rare item.
Adventurers
Adventurers are mercenaries who can be sent on missions to collect ingredients and items that can then be employed within the Forge. With each mission an Adventurer embarks on, they earn experience. With enough experience, an Adventurer can level up to the next level, with the current maximum at Level 10. The higher the level, the more likely the Adventurer is to return with multiple items.
Adventurers
There are currently two Adventurers available for use: Tyche and Nereus. Tyche represents the First City and is unlocked automatically. Some Adventurers, however, have requirements that must be fulfilled before they can be unlocked. These are linked to unlocking the outpost they represent. For instance, Nereus represents the Water Outpost and is unlocked by having a Water Outpost.
Each Adventurer has their own personality type that affect their ability to perform missions. These types are closely tied with the element they represent, which can be Spirit, Earth, Fire, Water, or Wind. When the type of the Adventurer matches the type of the chosen mission, they are more likely to find rare, more valuable items. Tyche’s Spirit-based type allows her to be more balanced and, as a result, she is able to easily collect items of all types. Nereus’ type is Water-based, however, so he is more prone to find items of a Water type.
Tyche
 |
Level | Exp. Req |
|---|---|---|
|
A lucky adventurer sure to bring you abundant treasures. This adventurer is good at finding all types of items. | ||
| 1 | 10 | |
| 2 | 50 | |
| 3 | 150 | |
| 4 | 300 | |
| 5 | 500 | |
| 6 | 1000 | |
| 7 | 2500 | |
| 8 | ||
| 9 | 5000 | |
| 10 | 10000 |
Nereus

A sea-savvy adventurer skilled at hunting treasures of the deep. This adventurer is good at finding water type items.
Missions
Sending an Adventurer on a mission allows you to gain com ponent items/ingredients and earns the Adventurer experience at the same time. You can see what missions are available to your Adventurer by either clicking the Adventurer’s tab or clicking the “View Missions” link in the upper right hand of the Adventurer’s tab. Once there, you can see the list of missions available, what you have the chance to find by undertaking that mission, what element the mission is (represented by the symbol next to the mission’s name), and what is required to undergo that mission. You can begin a mission by selecting the “Start” button on the mission you wish to send your Adventurer on. If it is grey and you cannot click it, that means you have not met all the requirements to begin this mission.
Some missions have certain requirements that must be met before you can take them on. These include having an Adventurer of a certain level or having a certain item/component. Each mission is guaranteed to yield at least one award, but every mission is different and yields different possible rewards. Even completing the same mission over and over may earn you different combinations of ingredients. Some are more difficult to acquire than others. Having an Adventurer of a higher level and assigning an Adventurer whose element matches the element of the mission increases the probability of finding the rarer items.